The Ultimate Guide to Posture Taping
The step-by-step guide to getting better postural correction results with Posture Taping. Increase your certainty so you can confidently apply Posture Tape without being a YouTube Taper!
In the Ultimate Guide to Posture Taping you will discover what Posture Taping is, why it is so beneficial to your clients, and how to apply Posture Tape to get optimal postural correction results. This is your step-by-step guide to Posture Tape application so you can get started right away using this beneficial treatment with your clients.
Why Posture Taping?
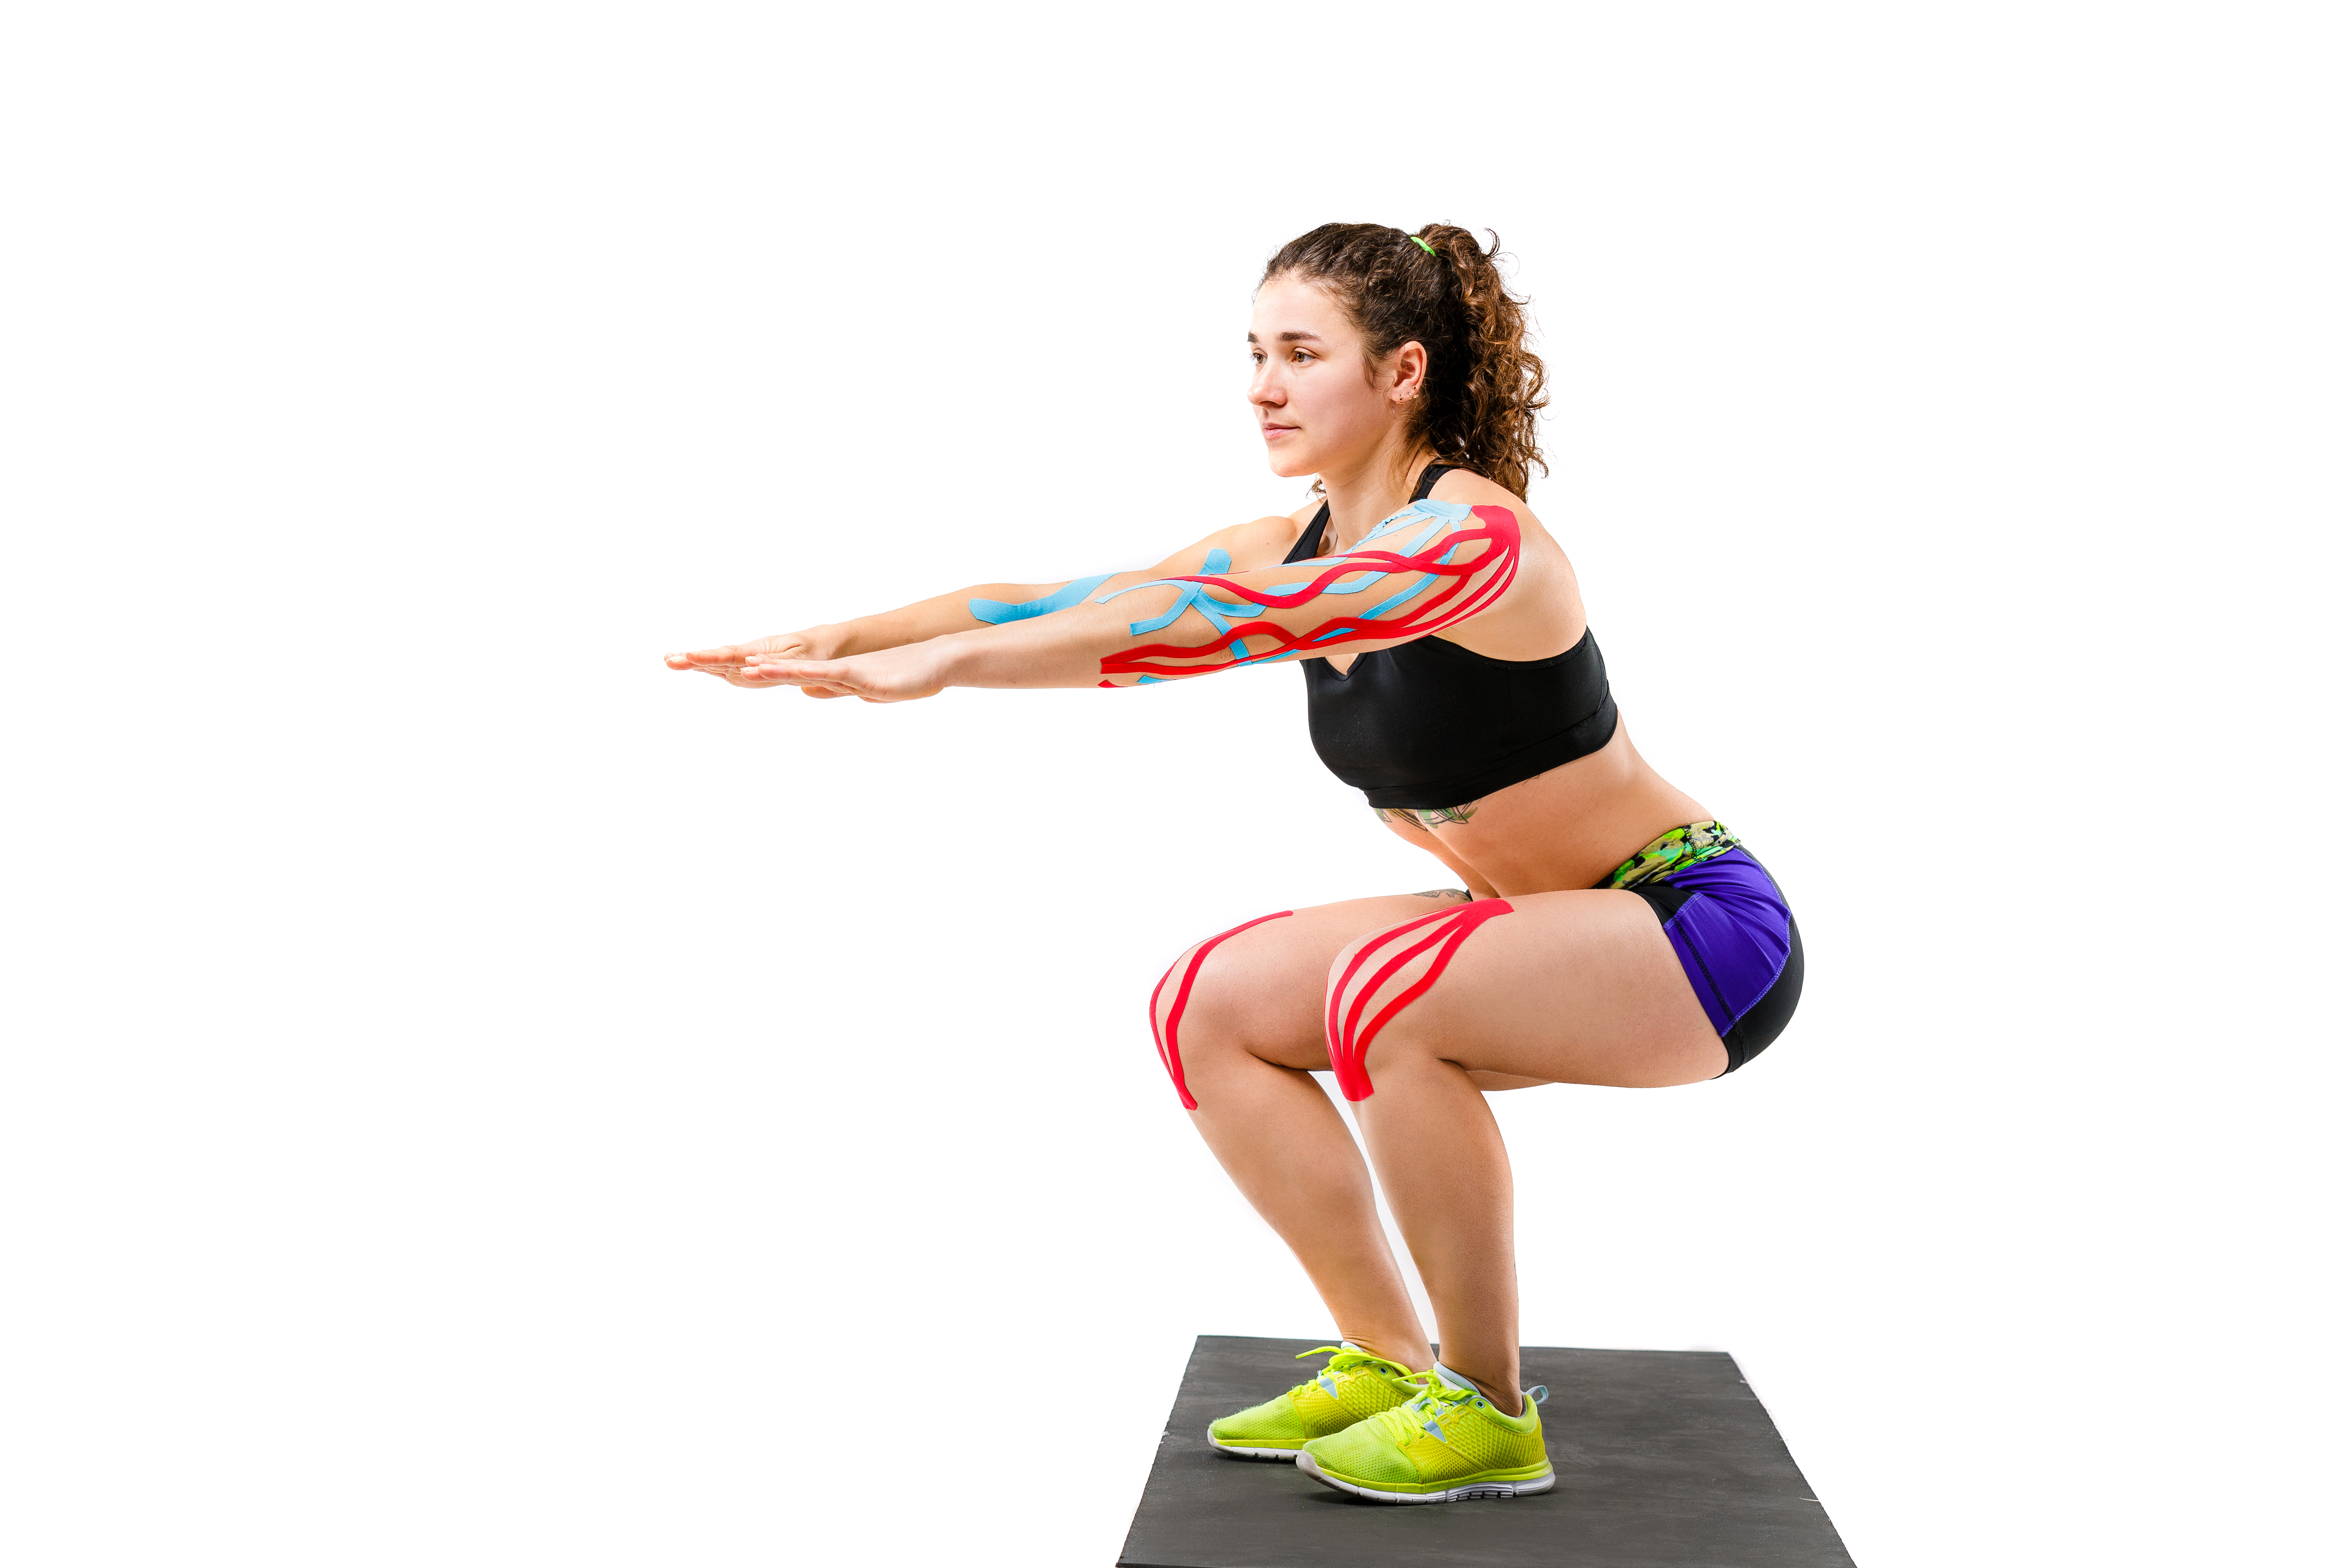
Functional Tape has many powerful benefits for your patients. In fact, if you watch a professional sports team play, or high level competitive athletes in action, you’ll probably notice that many of them are wearing bright colored tape. They are wearing Functional Tape because it helps them perform at the highest level.
Functional Tape is an easy-to-implement therapy that can benefit your clients in many different ways including pain relief from chronic pain, edema reduction from bruising or swelling, improved proprioception for better functional output, and posture habit re-education for postural correction.
When you utilize Functional Tape for the purpose of postural correction, it’s called Posture Taping. There are 3 components of Complete Postural Correction: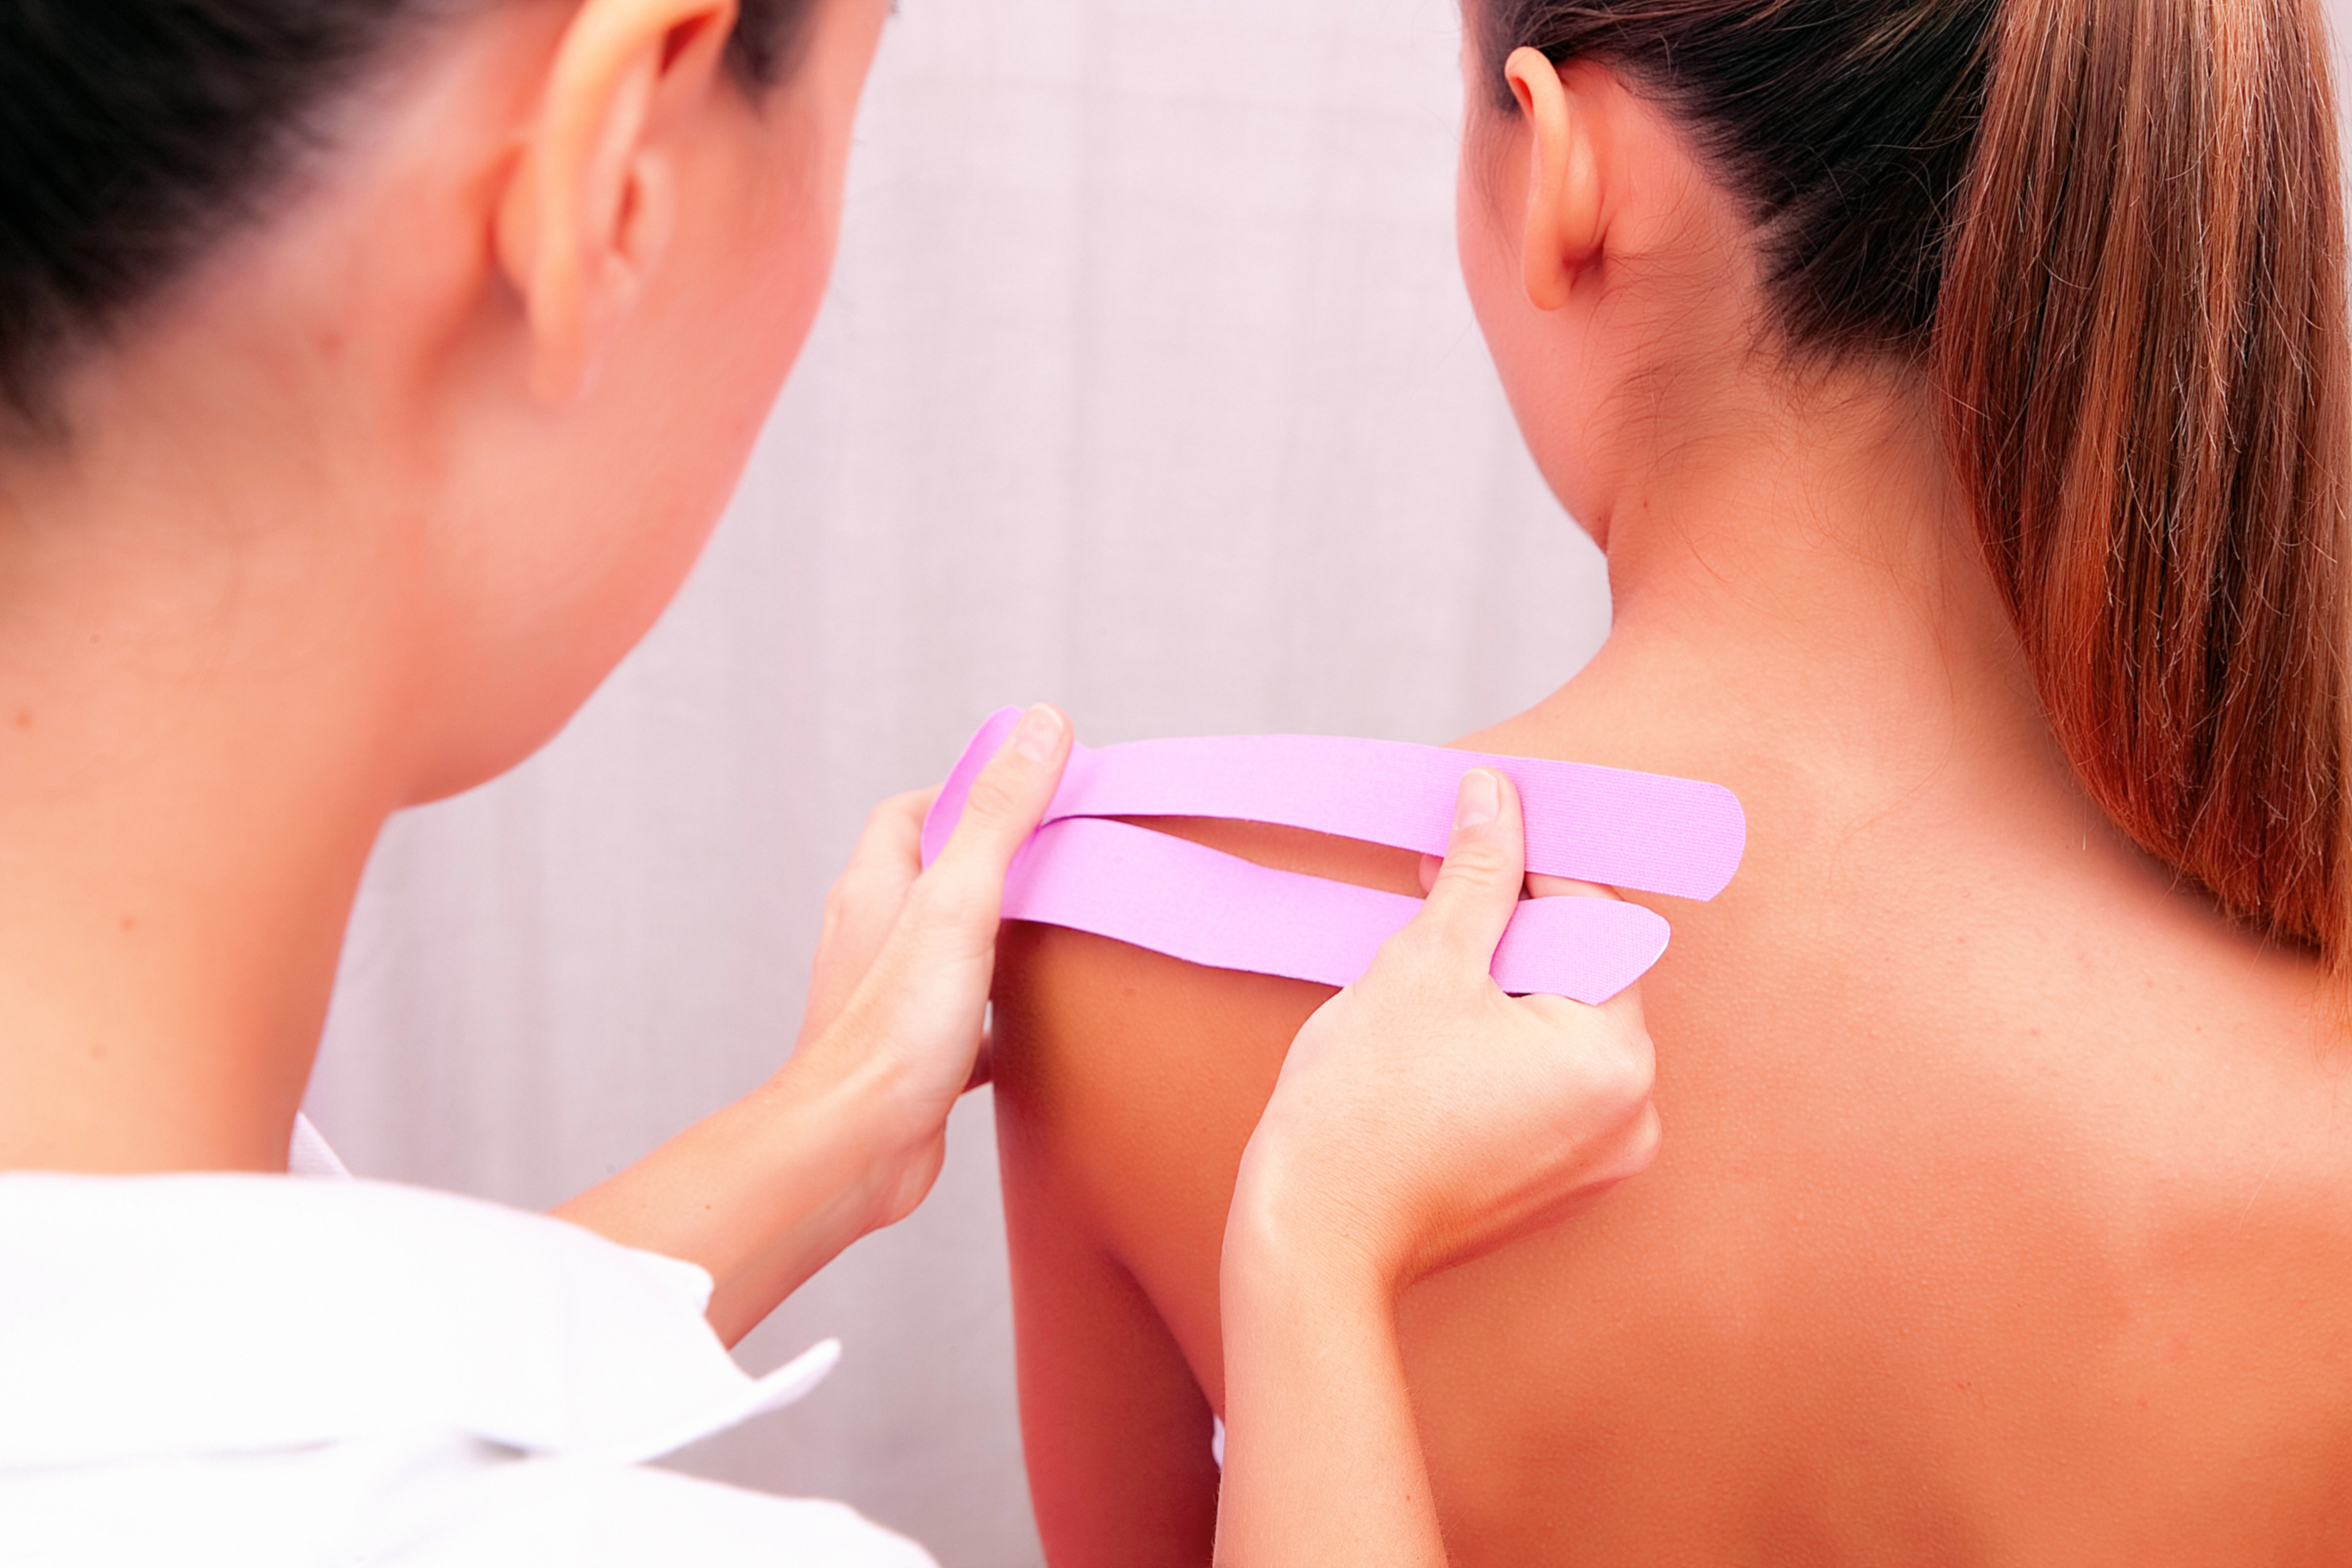
- Spinal Alignment
- Posture Rehabilitation
- Posture Habit Re-Education
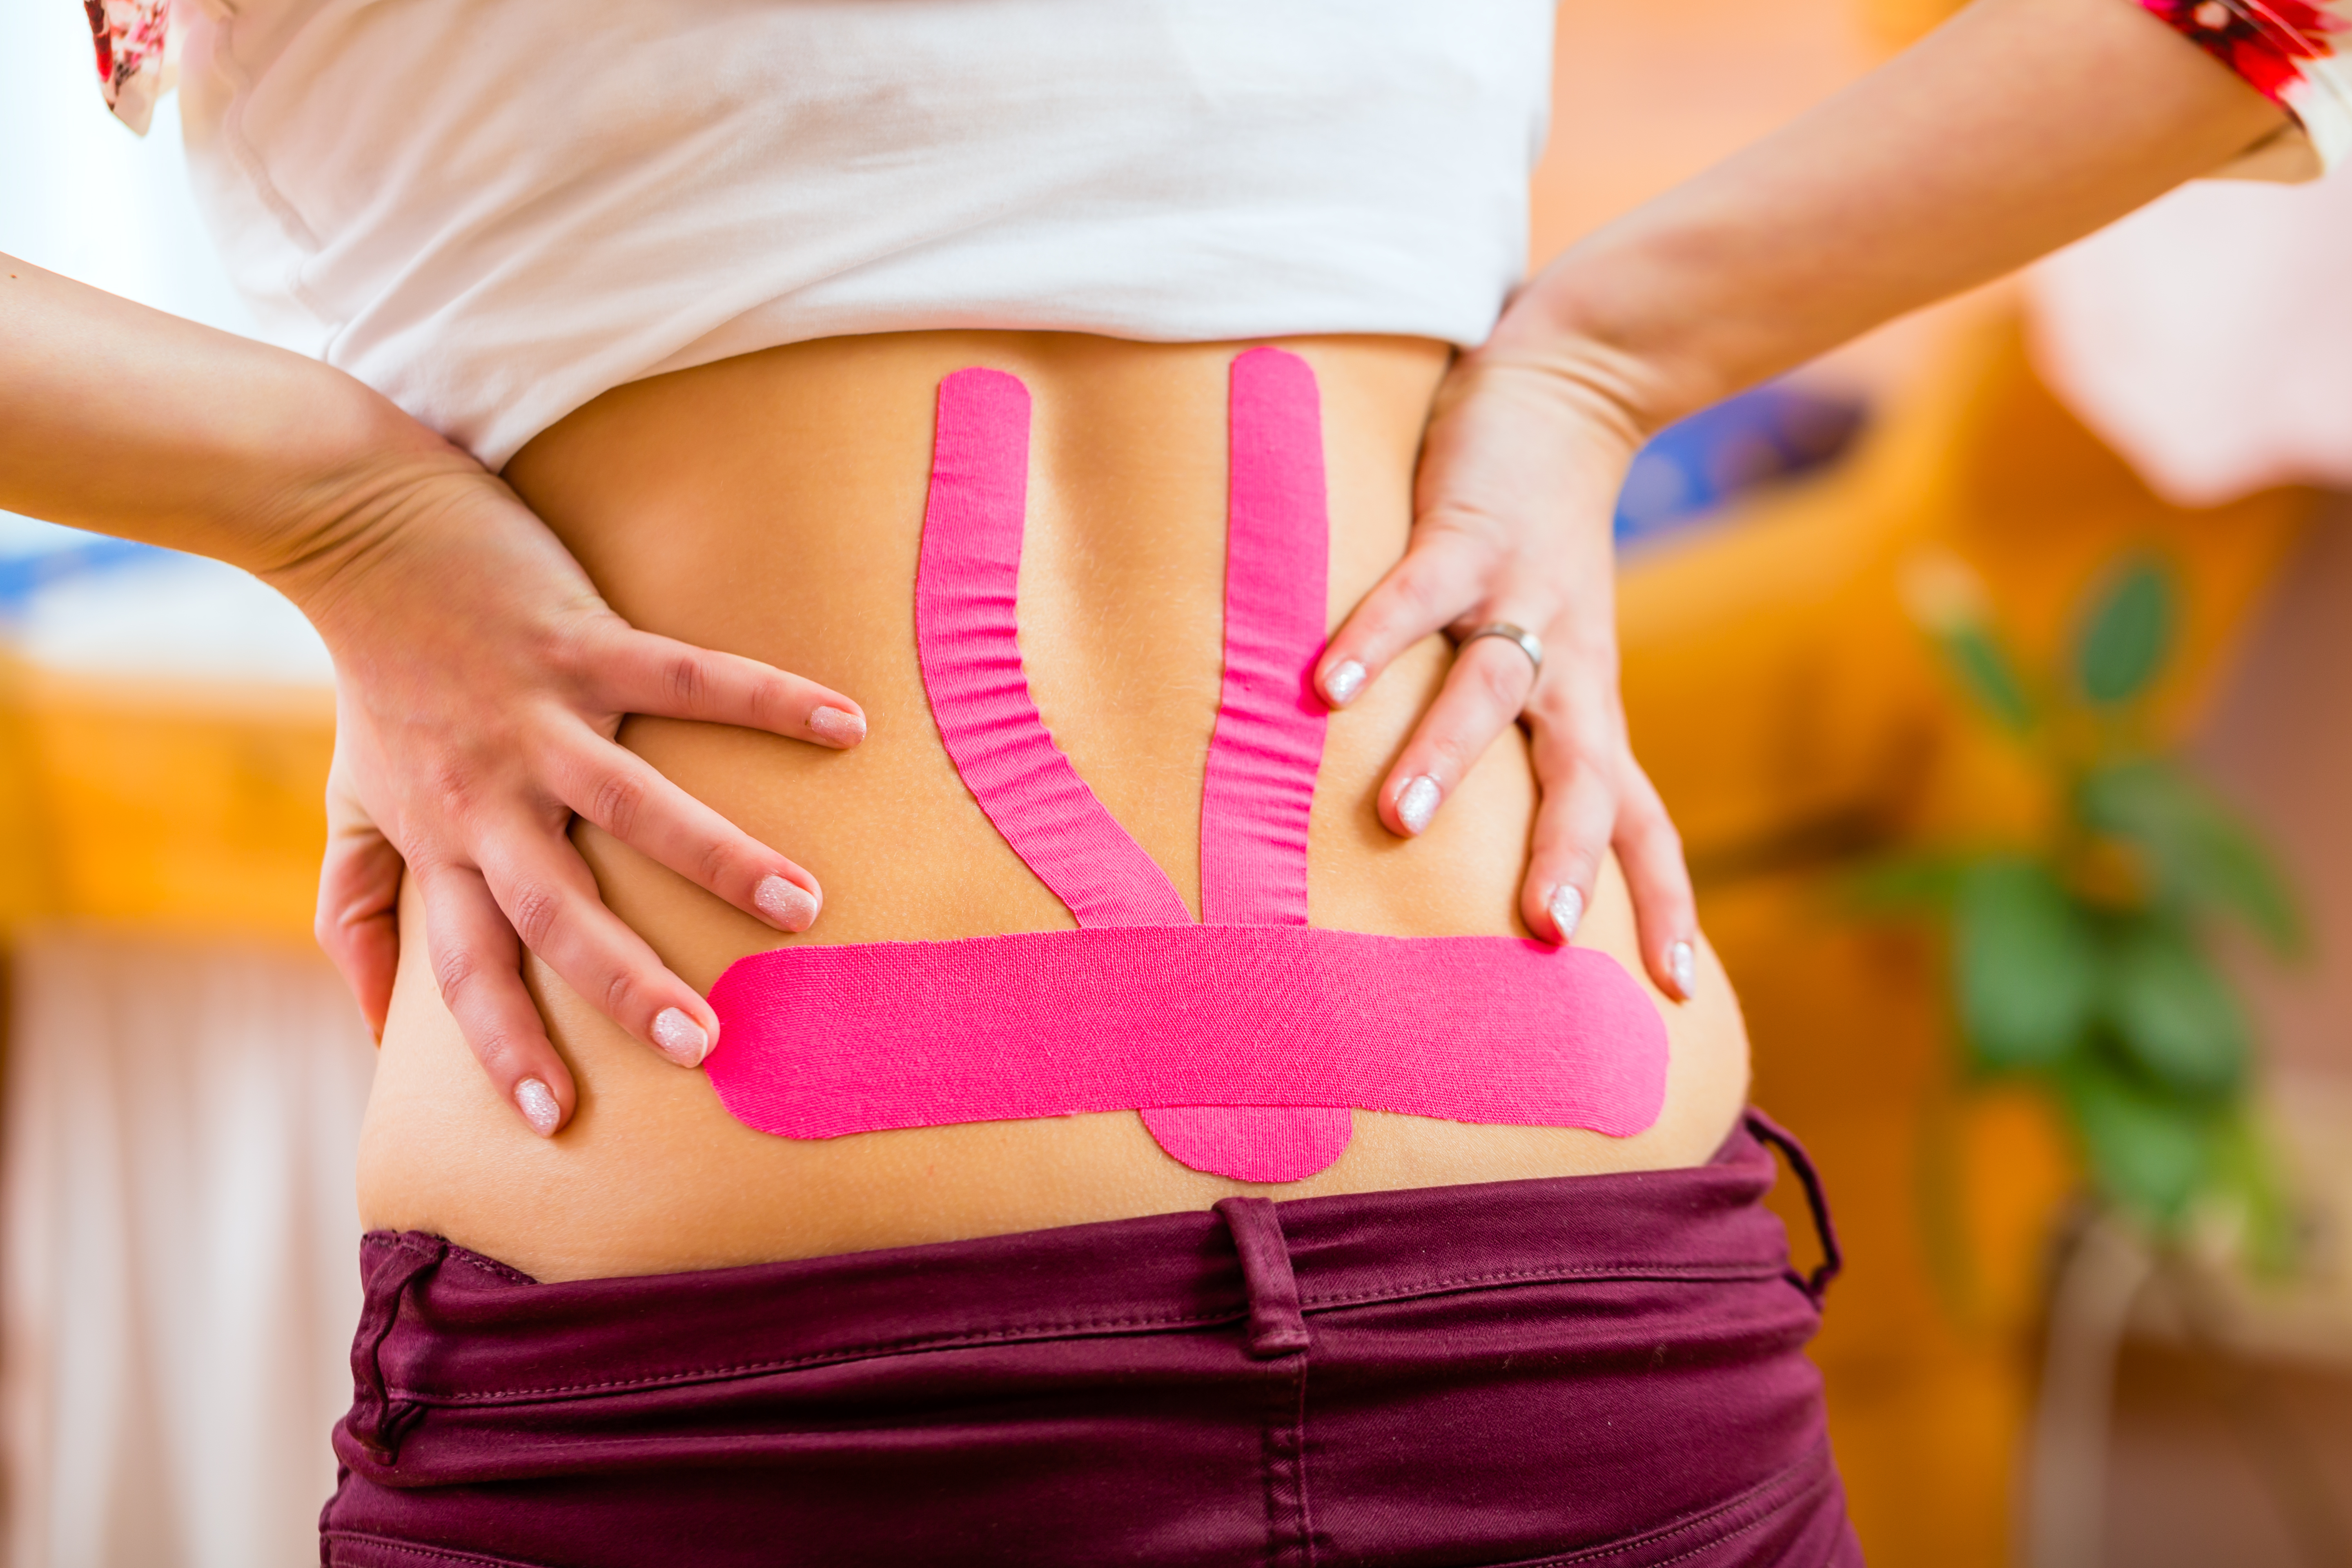
Posture Taping is used as a posture habit re-education reminder. This Posture Reminder, applied to the skin is a 24-hour reminder to have proper posture. Posture Taping improves proprioception of the Posture System, and serves as a trigger to correct your clients’ posture when they start to slump.
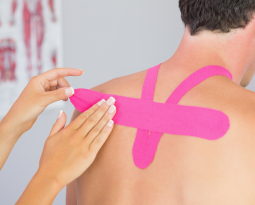
You will discover how to apply Posture Tape in this guide. You’ll notice that a long “I”-Band goes across your shoulders and upper back, or forms an “X” pattern across the upper back. As the client collapses forward in poor posture, they can feel the tape pull. This is the perfect reminder to maintain proper upright posture.
How does Posture Tape Work?
Have you ever used Functional Tape with your clients, or worn it yourself? If you have, then you have probably noticed that Functional Tape is flexible, not restrictive. There is a time and a place for restrictive tape, such as an ankle sprain or instability. This type of tape protects instable tissues.
Functional Tape is completely different because it is flexible, and has a different mechanism to improve function. Researchers have proposed two primary theories of how Functional Tape works.
The first of the two main theories proposed to explain the reported functional effects of Functional Tape, refers to the lifting effect allowing increased blood and lymph circulation. Increased blood and lymphatic fluid circulation in the taped area due to a lifting effect creates a wider space between the skin and the muscle and interstitial space (Halseth et al., 2004). The improved circulation initiates the healing effect necessary to improve chronically compromised tissues.
An additional theory is that Functional Tape may apply pressure or continual stretching of the skin within the taped area. This external activation of cutaneous mechanoreceptors activates modulatory mechanisms within the central nervous system demonstrated as an increase in muscle excitability and proprioception (Gomez-Soriano, 2013). By increasing muscle excitation and proprioception, there is evidence supporting the utilization of Functional Tape for performance-based objectives, not just therapeutic.
Posture Tape is Simple to Implement and Highly Beneficial to Your Clients
There are very few therapies that offer such a high return on investment as Posture Tape. By adding this additional modality to your clinical tool belt, you are providing patients with further healing effects that they may not have achieved any other way. Or, if you can stimulate the same effects in other ways, it requires more of your time with the client.
Simple to Implement:
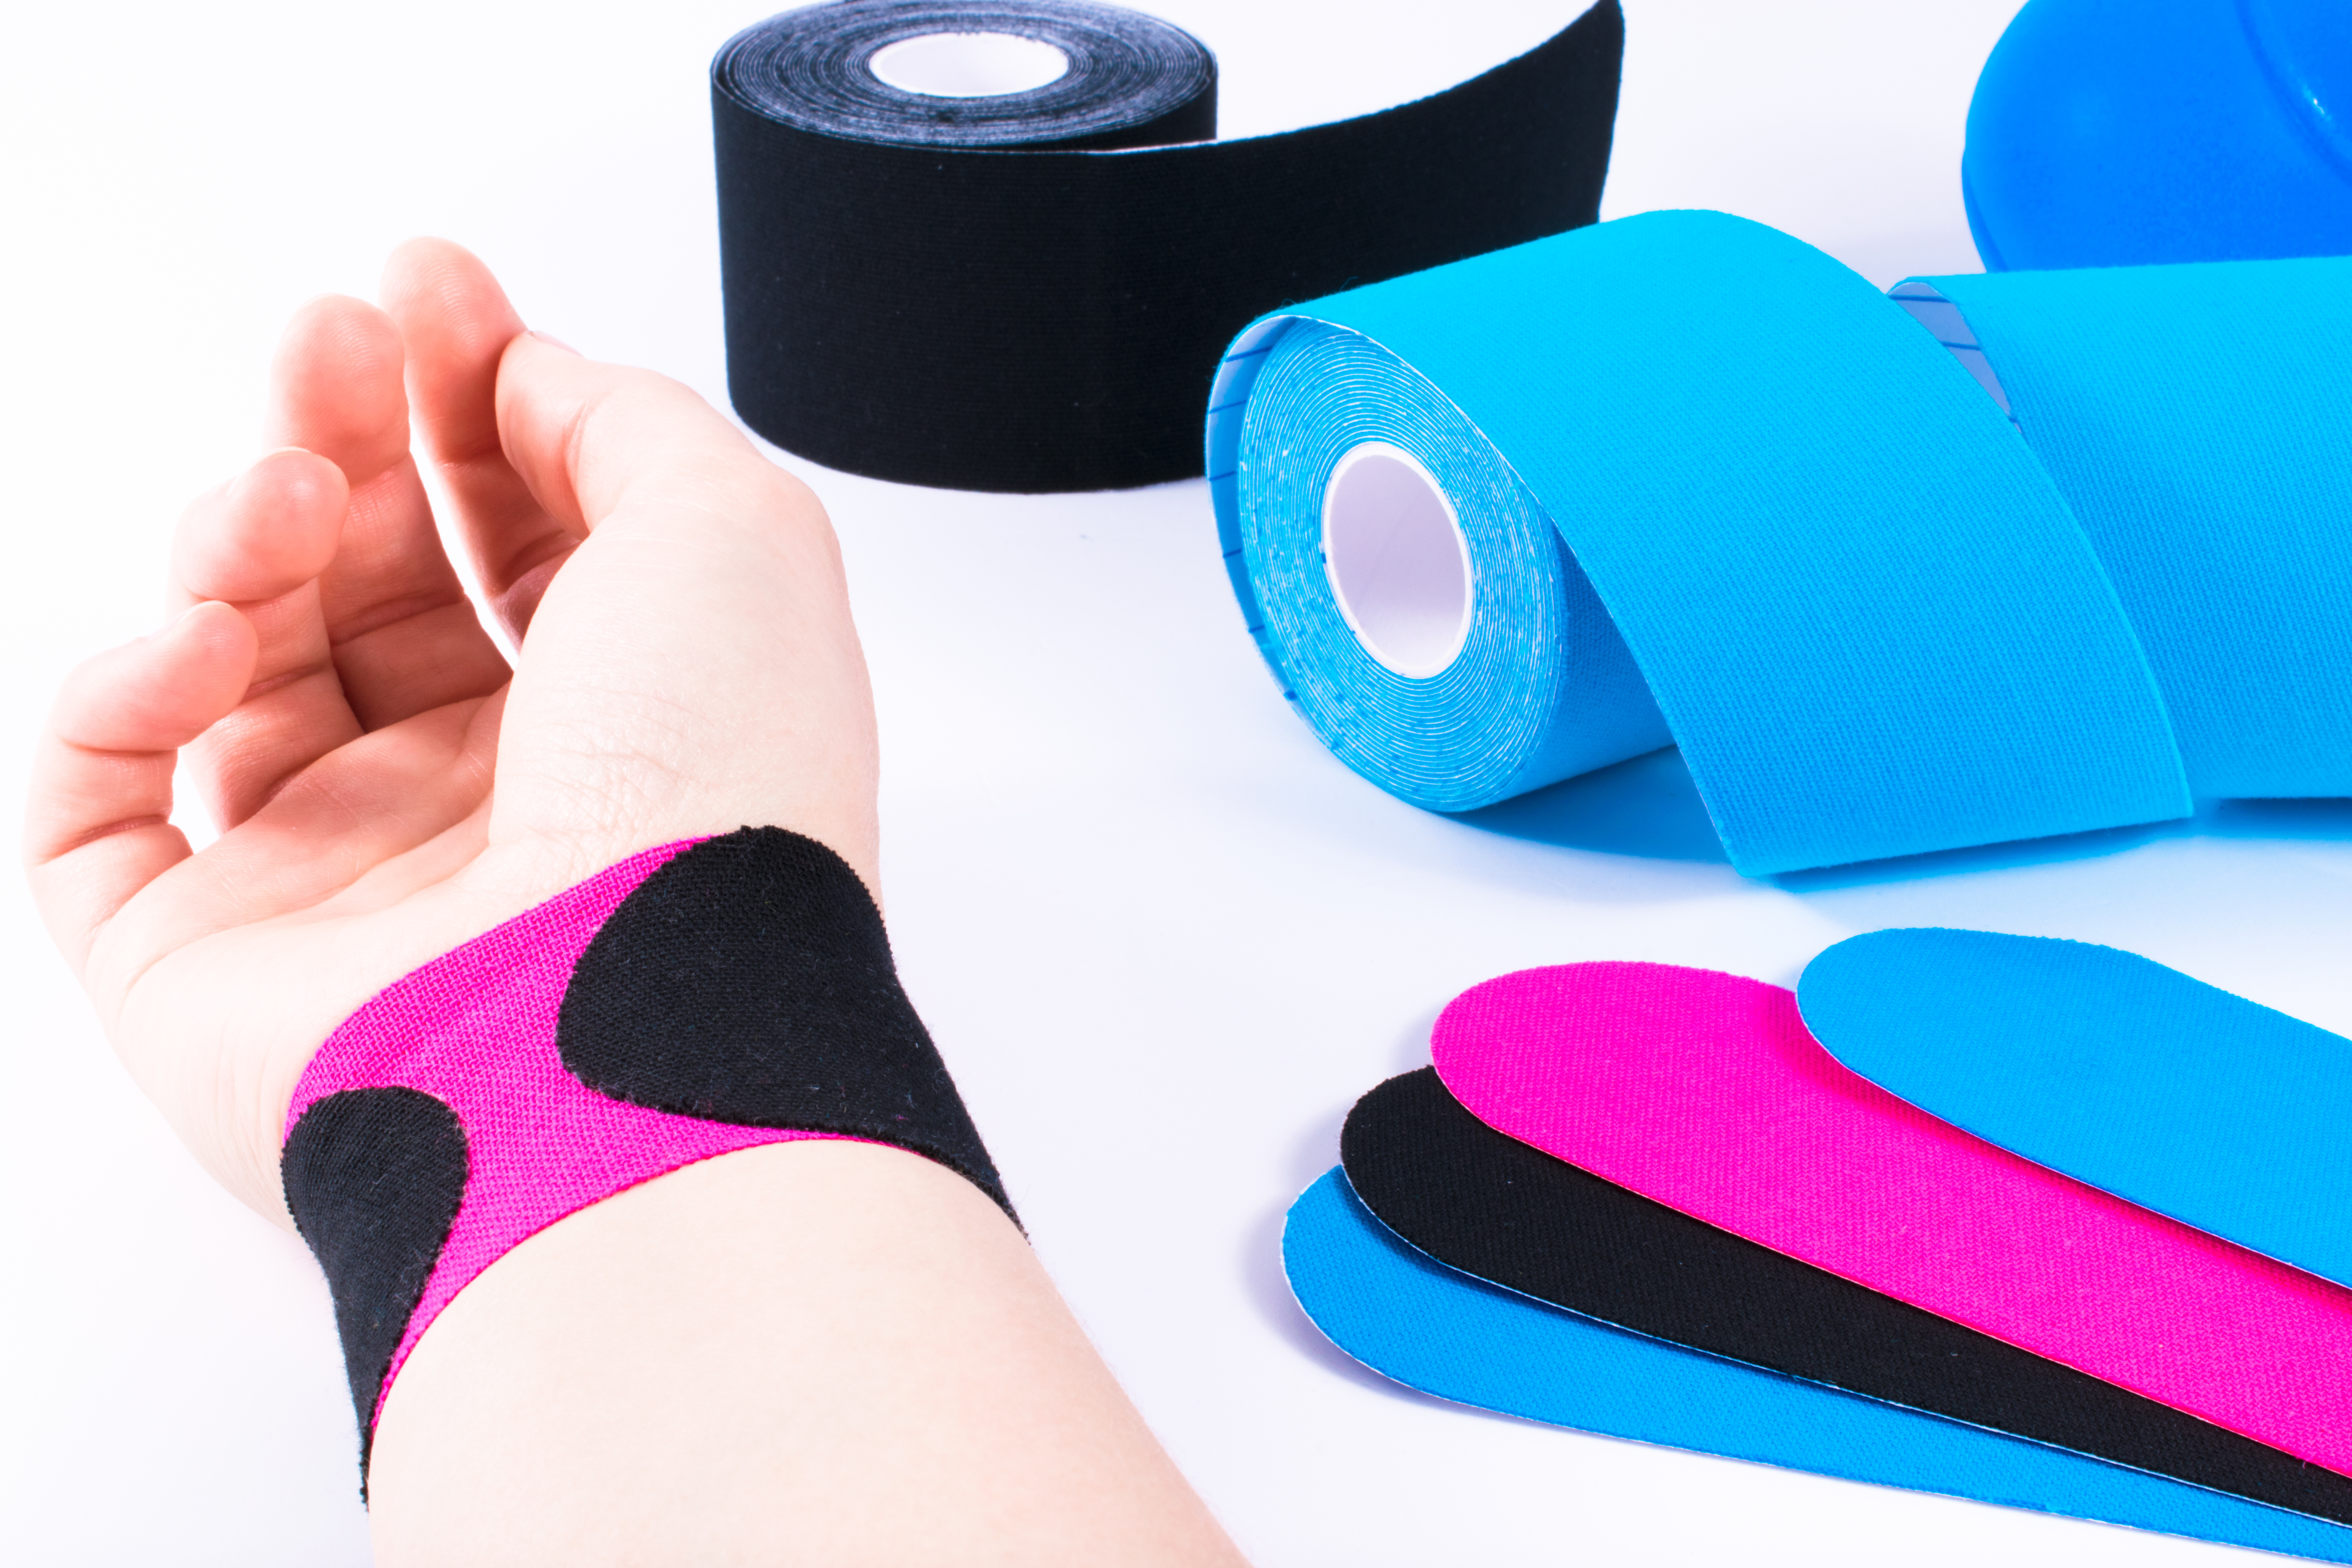
Unlike many other therapies that require buying a bunch of new equipment for your practice, Posture Taping is simple to implement. All you need is a few rolls of Functional Tape, a good pair of scissors, and the know-how to properly apply Functional Tape for the desired benefit. The overall cost of implementation is less than $50. This is a very minimal investment for the high return.
Benefits of Posture Tape:
- High Financial Return:
Functional Tape is inexpensive to purchase and you can charge an additional fee for application per treatment.
- Minimal Time Requirement:
It only takes about 5 minutes per patient to apply Functional Tape. This is a minimal amount of time for the benefit.
- Functional Tape Works Around the Clock:
Functional Tape is a 24-hour stimulus that works even when the client is sleeping. This therapy works around the clock to help your clients get better results. - Great Compliance:
Compliance of your clients is simple with Posture Taping! As long as the Functional Tape is on, it is working. The client doesn’t have to do anything extra to make it work.
Don’t Be a YouTube Taper
Is Functional Tape really this great? Is it really possible to get great results, improve compliance, and make your clients happy all at the same time? The answer is YES… if you apply it correctly!
Please, Please, Please do not do your clients the disservice of being a YouTube Taper!
YouTube tapers are the healthcare professionals who have seen Functional Tape, wanted to join the craze so they bought some tape, then they sat down at their computer and watched YouTube videos of how to apply Functional Tape.
All YouTube Tapers have the same fate… They try it on a couple of clients, it doesn’t “work,” so they put the roll of tape back on the shelf and stop using it. Why didn’t it work? It’s not because Functional Tape doesn’t work, it’s because the YouTube Taper didn’t understand how to apply the Functional Tape, at what tension, and for what conditions.
 Posture Tape Application is Specific (Not one size fits all)
- Tape Tension:
There is a specific amount of tension to use for different purposes. For example, you apply 80% tension for pain relief and 0% tension for lymph drainage. - Pre and Post Tests:
Perform pre and post tests to ensure that desired results are achieved right away. If the desired result is not achieved, then modify the tape application. - Direction of Tape Application:
In some cases the tape is applied from Origin to Insertion, and in other instances it is applied from Insertion to Origin. Understanding the difference is important to get the best results.
How to Perform Posture Taping
Here are two methods of Posture Taping that will help your clients have better posture. Both serve as an important reminder for the client to stand up or sit up straight in proper posture, instead of collapsing forward with gravity.
One of the most common postural distortion patterns that people present with is forward head posture with anterior rolling of the shoulders, resulting in a C-shaped (slumped forward) spinal curvature. By placing the Posture Tape over the shoulders and upper back it helps your clients prevent rounding forward at the shoulders or collapsing forward with the pull of gravity.
These tape applications are highly beneficial for many clients, especially clients who are seated in front of a computer at work, or who tend to look down at their cell phone for prolonged periods of time.
Expert Application Tips:
For best results, use these expert application tips for the application of Posture Tape. These application tips help the tape stay on longer and ensure maximal benefit. 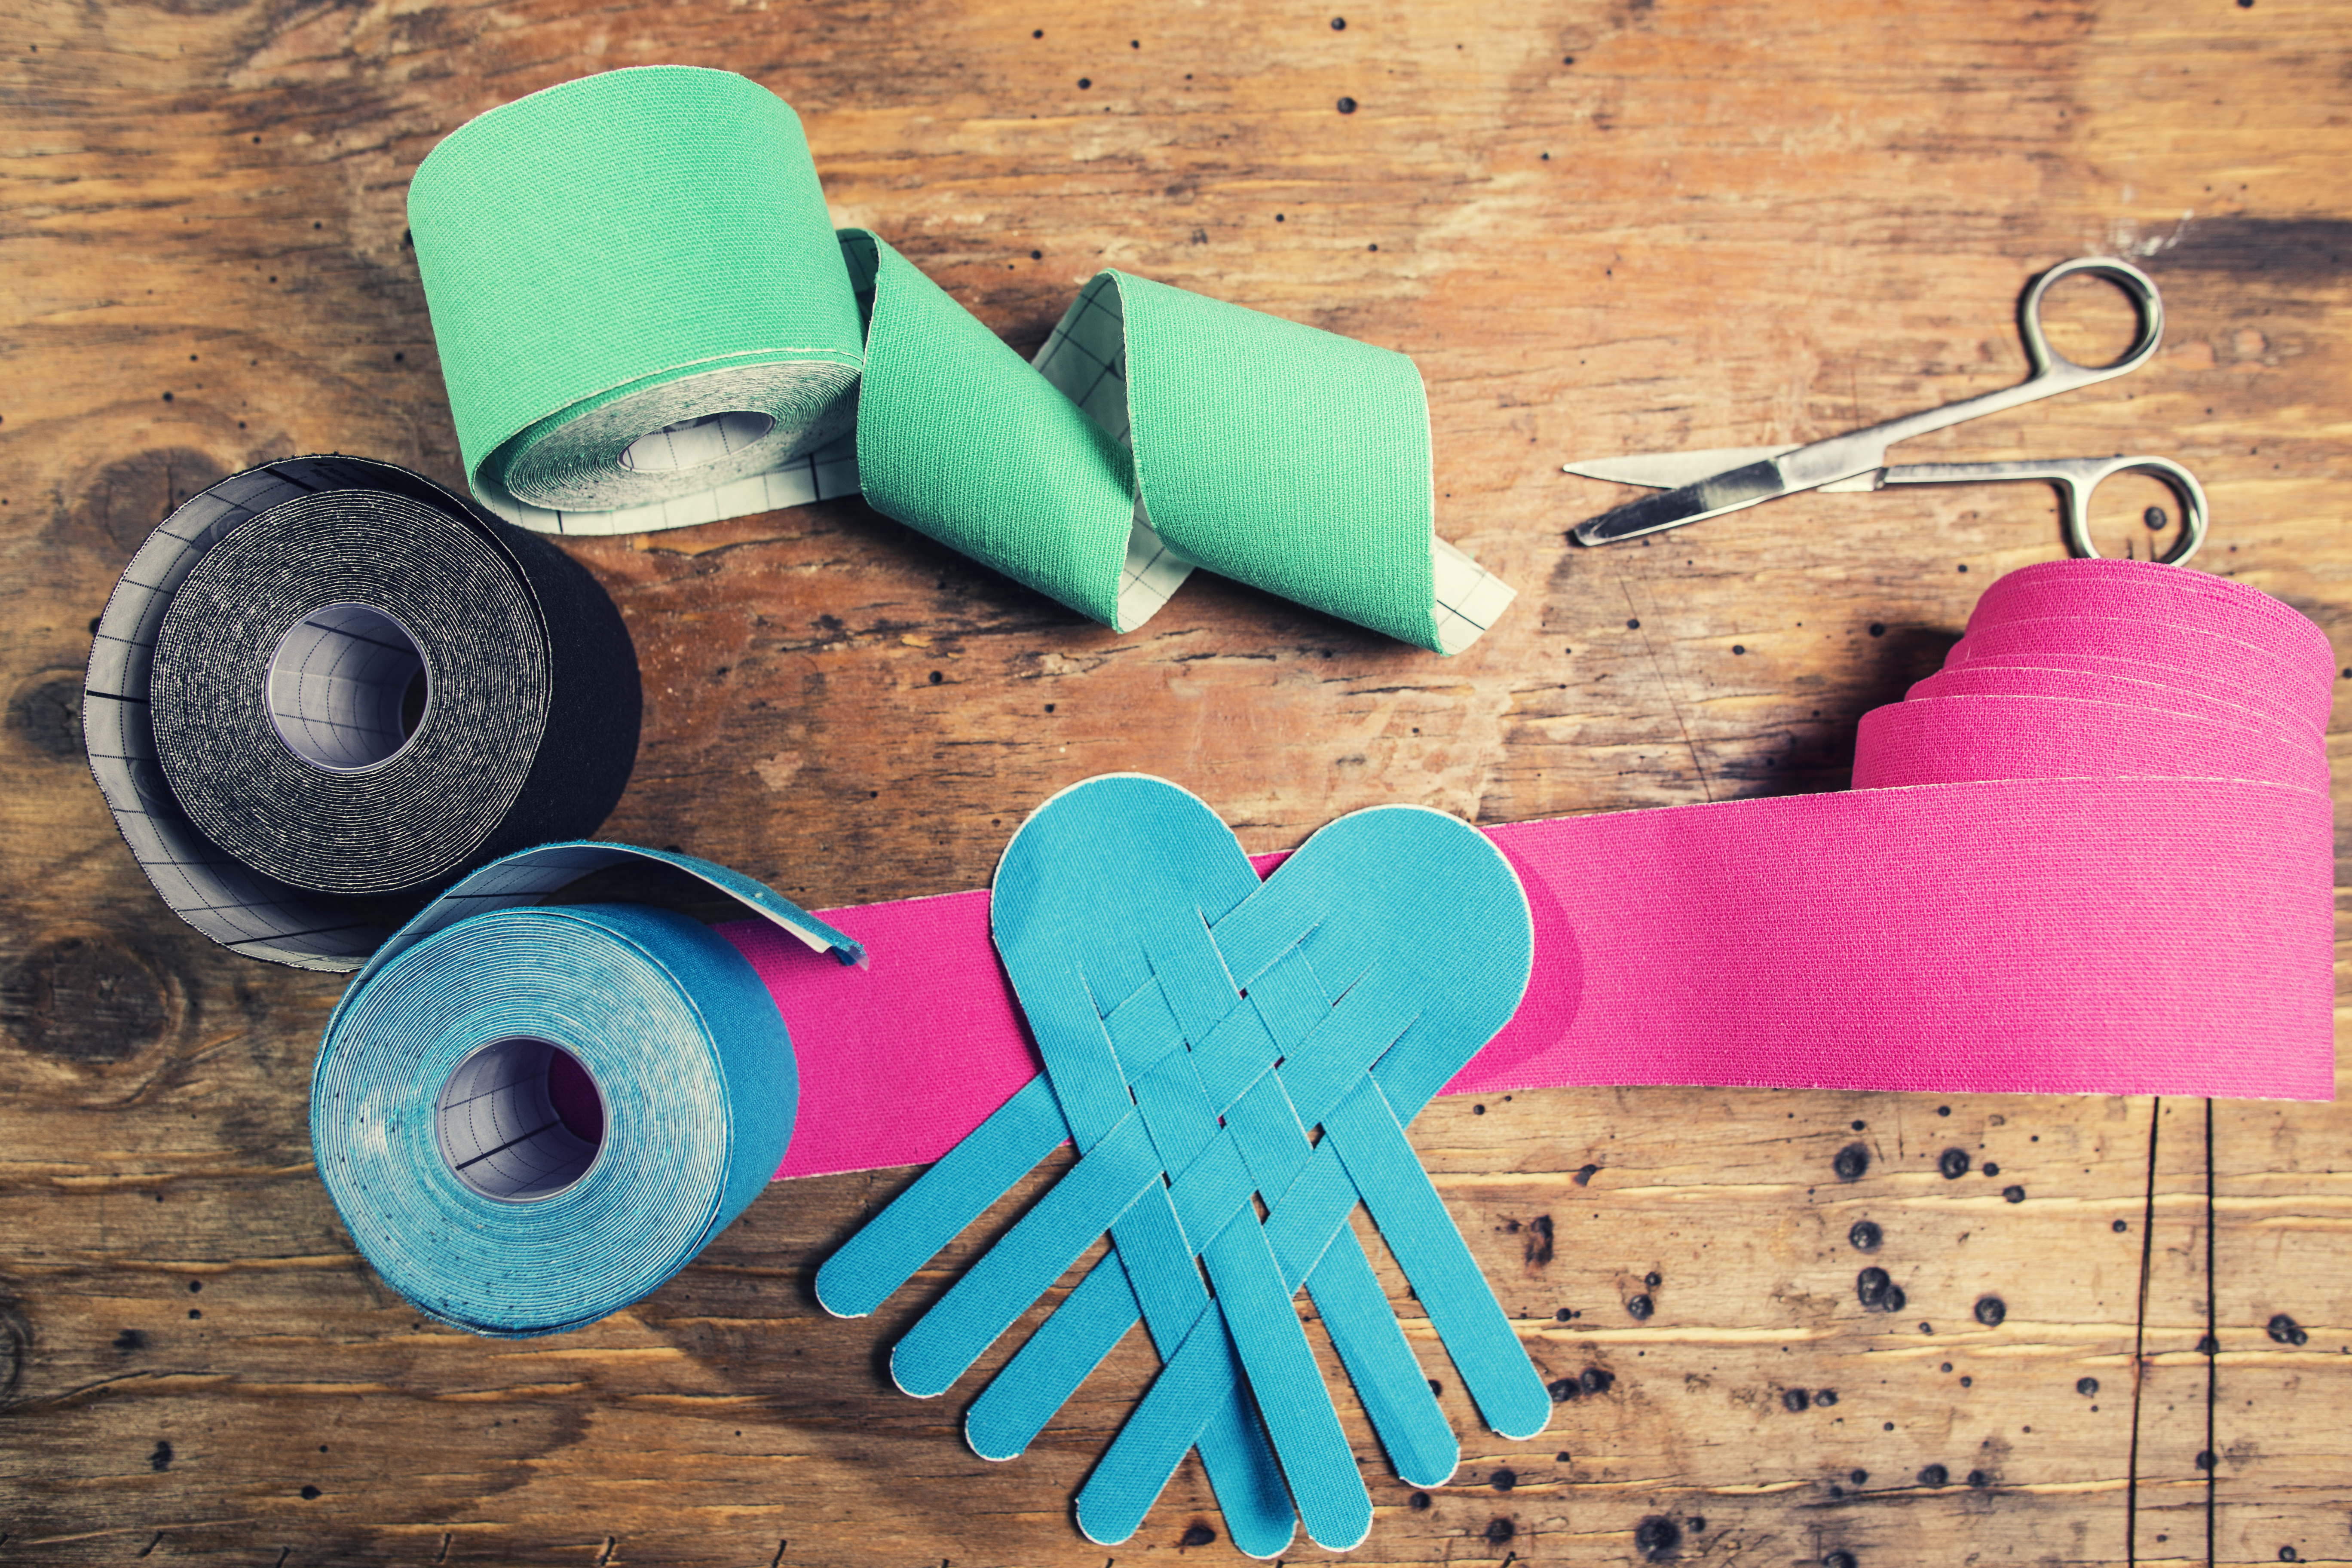
- Be sure the skin that the tape is being applied to is clean, the client is not wearing lotion, and if possible shave the skin of the area the tape is being applied to. Proper skin preparation helps ensure the tape will stay on longer and not peel off right away.
- Before applying the tape cut rounded edges of the tape so it doesn’t catch and peel off. The corners of the tape can easily catch and be peeled off if they are not rounded.
- Tape tension is important for achieving the desired result of the tape application. When applying tension, however, make sure the tension is in the center of the tape, not at the edges of the tape. This causes the tape to peel off sooner if there is tension at the tape ends, or the “anchors.”
- When applying Posture Tape to the spine apply the tape bilaterally to prevent excessive stretch of the tissue on one side of the spine and not on the other.
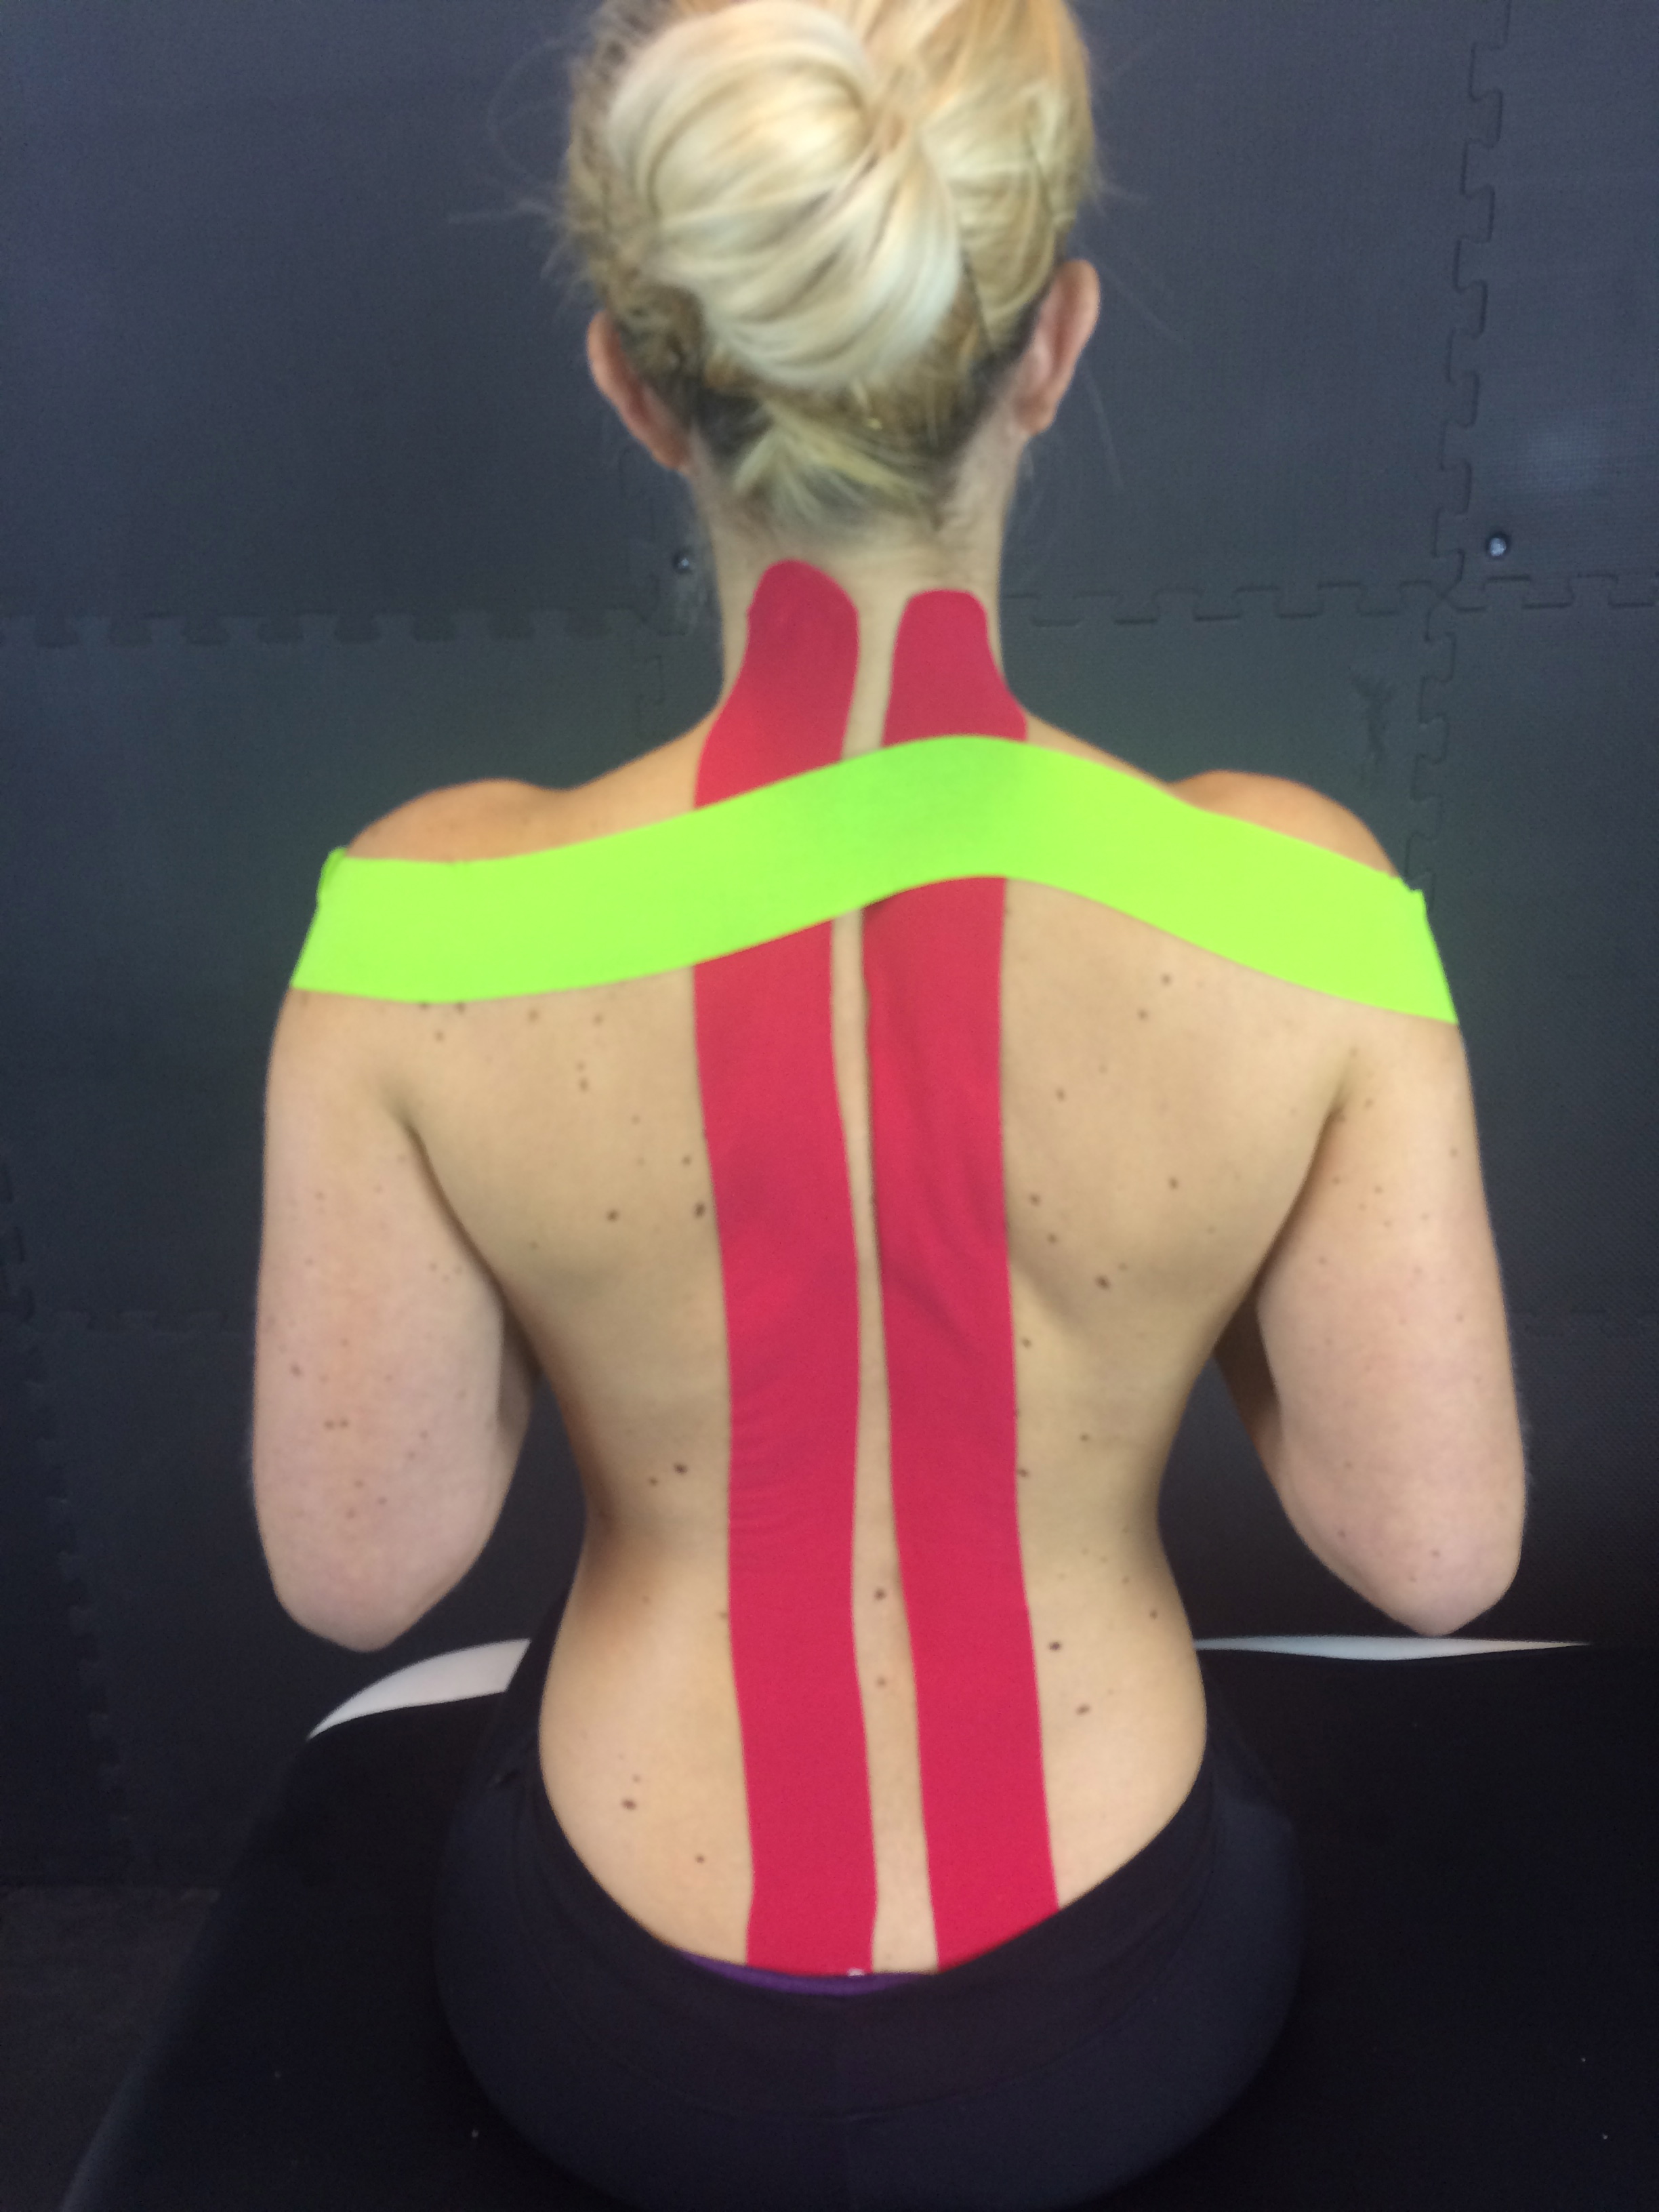
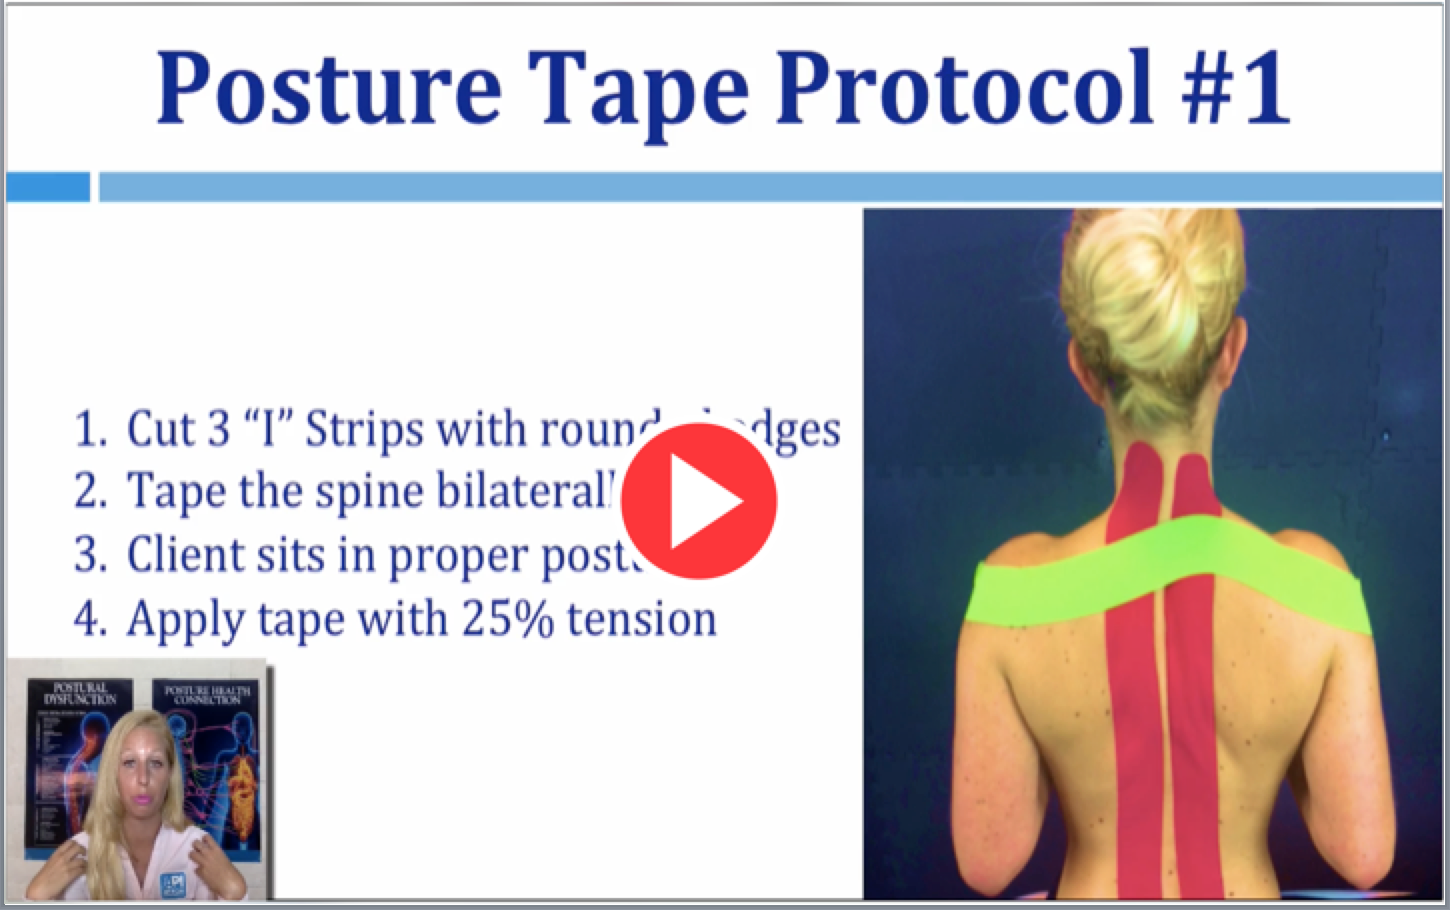
Posture Tape Application Technique #1
- Cut three long “I” strips with rounded edges
- Two pieces of tape that reach from the client’s neck to their lower back
- One piece of tape that goes from the anterior aspect of one shoulder to the anterior aspect of the other shoulder
- Posture Tape is applied with 25-50% tape tension in the middle of the tape (not at the edges)
- Apply the two long “I” strips on each side of the spine with tape tension of 25-50%. To apply the bilateral “I” strips have the client flex forward at the hips, apply the tape with them flexed anteriorly
- To apply the long “I” strip across the upper back, have the client sit up in proper posture. Starting at one shoulder, apply the tape to the anterior aspect of the shoulder, then continue to apply the tape across the upper back to the anterior aspect of the opposite shoulder.
- The Posture Tape should stay applied for approximately 3-5 days. The Posture Tape will increase proprioception of the Posture System while improving Posture Habit Re-Education.
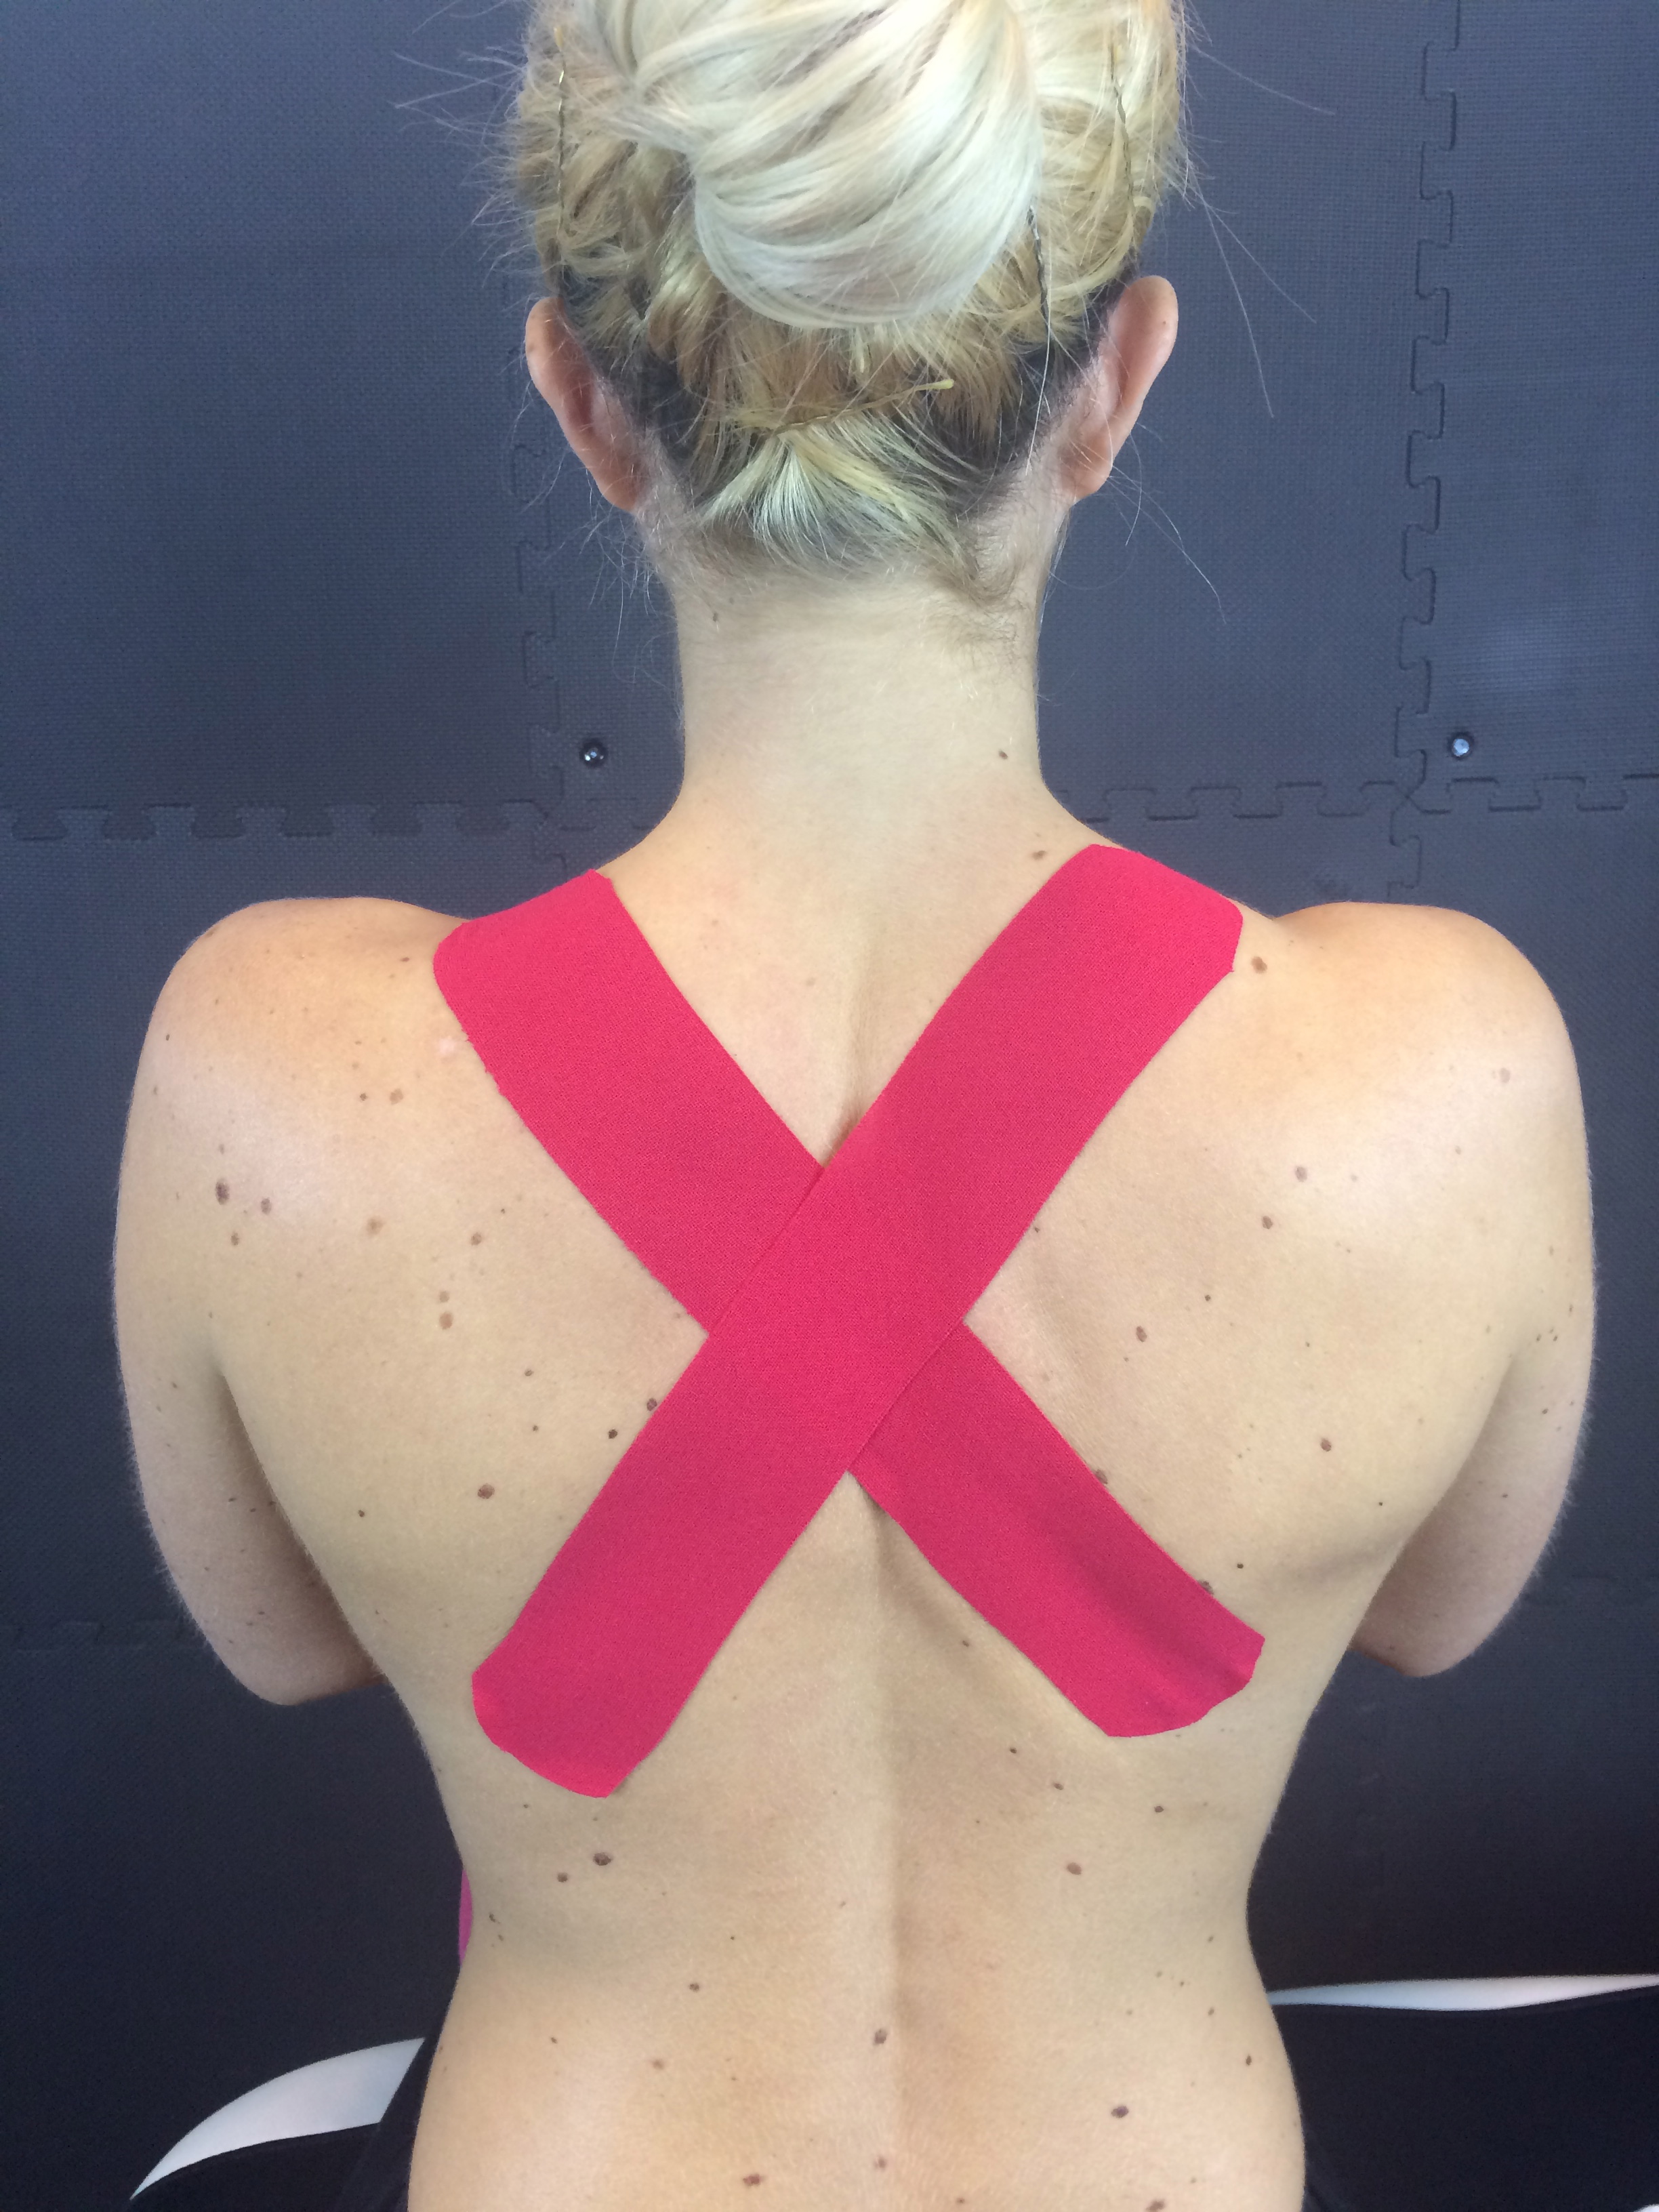
Posture Tape Application Technique #2
- Cut two “I” strips with rounded edges
- Posture Tape is applied with 25-50% tape tension in the middle of the tape (not at the edges)
- Apply the two “I” strips in an “X” formation with the patient sitting up in proper posture. Begin with one piece of tape and apply the anchor of the tape between the top of the shoulder and the base of the cervical spine. The tape will end under the opposite scapula. Apply the second piece of tape in the same manner, beginning on the opposite shoulder and extending down below to the contralateral scapula
- The Posture Tape should stay applied for approximately 3-5 days. The Posture Tape will increase proprioception of the Posture System while improving Posture Habit Re-Education.
Get the Research
A research study conducted by Yoo (2013) demonstrated that the utilization of Functional tape was effective in the reduction of forward head posture. In the study that Yoo (2013) performed, he concluded that the forward head posture angle significantly decreased for participants during computer work with neck retraction tape compared to workers who did not utilize tape.
In a study conducted by Saavedra-Hernandez, et al. (2012), it was concluded that Functional Taping is an effective treatment protocol for decreasing neck pain and disability in individuals presenting with mechanical neck pain.
According to Huang et al. (2011) the beneficial effects of Functional Tape include physical corrections, fascia relaxation, space recuperation, ligament and tendon support, movement rectification, and lymphatic fluid circulation.
Implementing Posture Taping with your clients is a great way to get better results and increase your collections per visit without spending a lot of extra time per client. Adding Posture Taping to your treatment tool belt helps improve results, compliance, and satisfaction.
–
–
Posture Taping is a Win-Win.
DOWNLOAD A FREE 7-MINUTE VIDEO ON POSTURE TAPING:
To learn more about Advanced Posture Taping get this free video Advanced Posture Taping Solutions. In this video you will see the Posture Taping protocols in action with step-by-step instruction and expert application tips. Your Success is Our Priority, get the free video and begin implementing Posture Taping right away with your clients. Don’t be a YouTube Taper, be an Advanced Posture Taper!
References:
Gomez-Soriano, J., Abian-Vicen, J., Aparicio-Garcia, C., Ruiz-Lazaro, P., Simon-Martinez, C., Brano-Esteman, E., & Fernandez-Rodriguez, G. (2013) The Effects of Kinesio Taping on Muscle Tone in Healthy Subjects: A double blind, placebo-controlled crossover trial. Manual Therapy, 19, p. 131-136.
Halseth, T., McChesney, J., DeBeliso, M., Vaughn, R., & Lien, J. (2004) The Effects of Kinesio Taping on Proprioception at the Ankle. Journal of Sports Science and Medicine, 3(1) p. 1-7.
Huang, C., Hsieh, T., Lu, S., & Su, F. (2011) Effect of the Kinesio Tape to muscle activity and vertical jump performance in healthy inactive people. Biomedical Engineering Online, 10(70).
Saavedra-Hernandez, M., Castro-Sanchez, A., Arroyo-Morales, M., Cleland, J., Lara-Polom, A., & Fernandez-de-las-Penas, C. (2012) Short-term effects of Kinesio Taping versus cervical thrust manipulation in patients with mechanical neck pain: a randomized clinical trial. Journal of Orthopaedic & Sports Physical Therapy, 42(8) p. 724-730.
Yoo, W. (2013) Effect of the Neck Retraction Taping (NRT) on Forward Head Posture and the Upper Trapezius Muscle during Computer Work. Journal of Physical Therapy Science, 25(5) p. 581-582.